This guide will show you how to connect your CodeBug Connect to the Internet with WiFi. Once setup, you’ll be able to:
send new programs to your CodeBug Connect from the website
update the system software on CodeBug Connect
store and log data online from your CodeBug Connect – for example you could record air quality and monitor it remotely from your smartphone
send messages to make your CodeBug Connect do something remotely – for instance, send a tweet to change the colour of its lights.
These steps will show you how to setup WiFi using a web browser. (It’s also possible to setup WiFi on CodeBug Connect by editing a file, which although is great if you’ve got a batch to set up, it’s less user friendly at first).
By default, CodeBug Connect tries to connect to an WiFi access point. When it can’t, it creates it’s own access point for you to connect to.
In this guide, you’re going to connect to this access point hosted by CodeBug Connect and then give it the details of the WiFi access point that will give CodeBug Connect Internet access.
Power on Codebug Connect.
Wait for CodeBug Connect to scan for available networks, indicated by purple wifi scan.
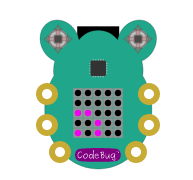
Watch for CodeBug Connect’s display briefly showing blue, indicating no suitable network was found. CodeBug Connect will now start its own access point.
Be ready for CodeBug Connect to scroll in red ap followed by the name of its access point. The name will be
codebug_xxxxxxxwhere x is a number or letter a-f.
From your computer or smartphone perform a scan for wireless networks and look for the
codebug_xxxxxxxnetwork.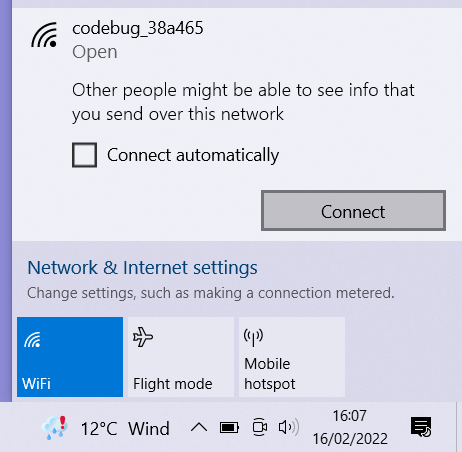
Connect to the corresponding
codebug_xxxxxxxnetwork.Note
When you connect to your CodeBug Connect like this, your laptop will no longer be connected to your old access point, and as such, may not have Internet access! This will only be brief – you’ll switch back to your normal access point once you’ve set up CodeBug Connect.
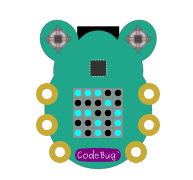
Watch for CodeBug Connect scrolling in green an address beginning
http://. Usually, this will behttp://192.168.4.1.
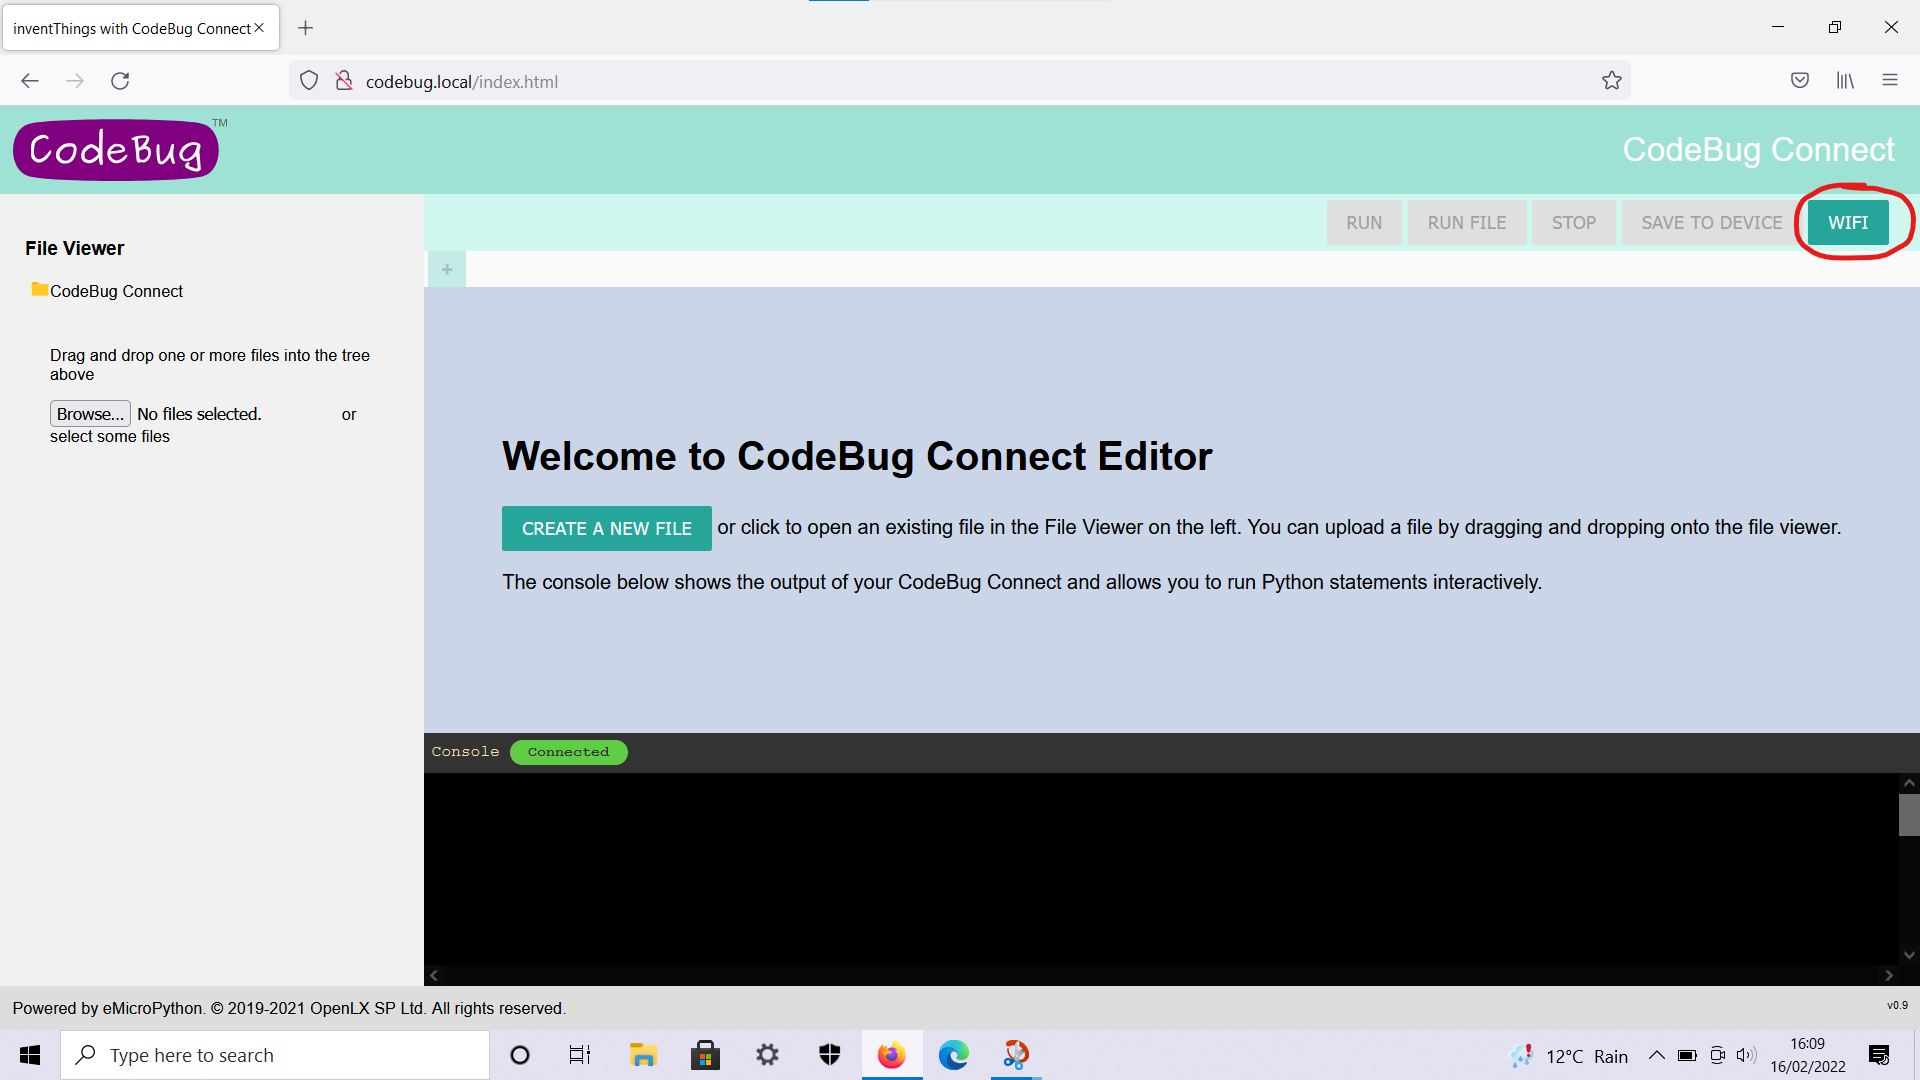
On your laptop or smart phone, open a web browser.
In the web browser try visiting http://codebug.local . If this does not work for your operating system, you need to visit the green address that scrolled past (this is usually http://192.168.4.1).
After a few seconds CodeBug Connect’s onboard IDE will load. Click the WiFi button on the top right of the page.
CodeBug Connect will scan for WiFi networks nearby. From the window that pops up, choose your access point, enter your WiFi’s password and click save.
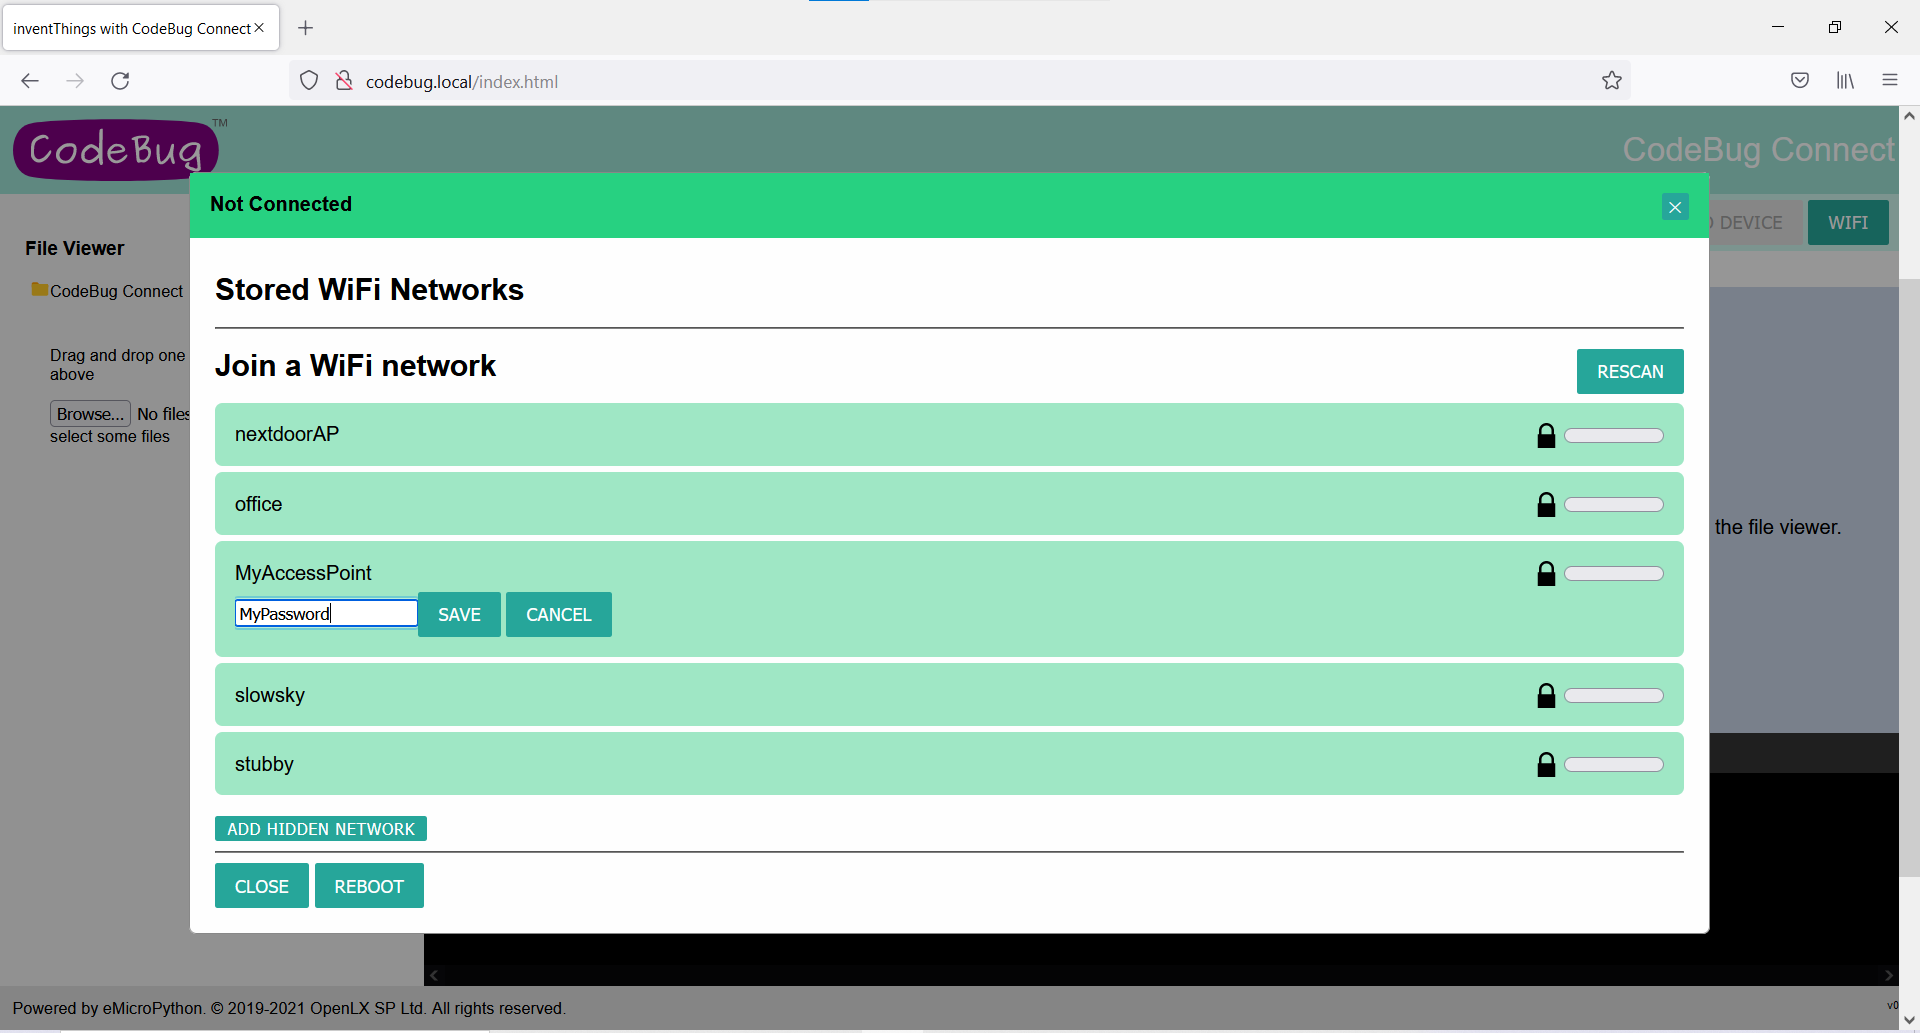
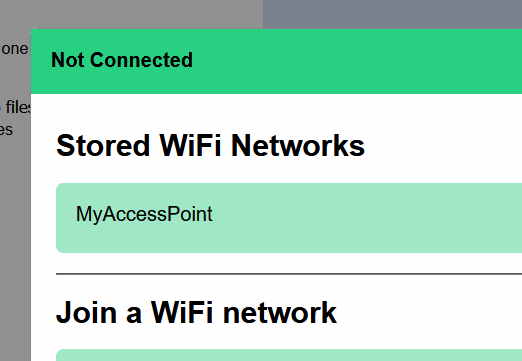
Wait for the window to reload. It should show the newly stored access point.
Click reboot.
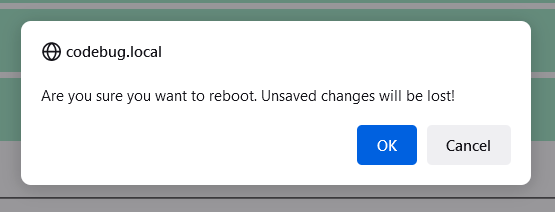
Click to confirm you want to reboot.
CodeBug Connect will stop hosting it’s own access point. You may need to reconnect your laptop or smartphone to your usual WiFi access point, or some devices will do it automatically.
Following the restart, CodeBug Connect will now try and connect to a stored access point.
Watch the display on CodeBug while it boots. If successful, it will briefly show green and then scroll the address it’s been given by your router. You may need to make a note of this address if connecting to http://codebug.local did not work earlier.
Check you can access your CodeBug Connect on your local network by visiting http://codebug.local, or if that doesn’t work, the address in green you made a note of.
Now that CodeBug Connect is connected to your network, we recommend you adopt it on the CodeBug website.