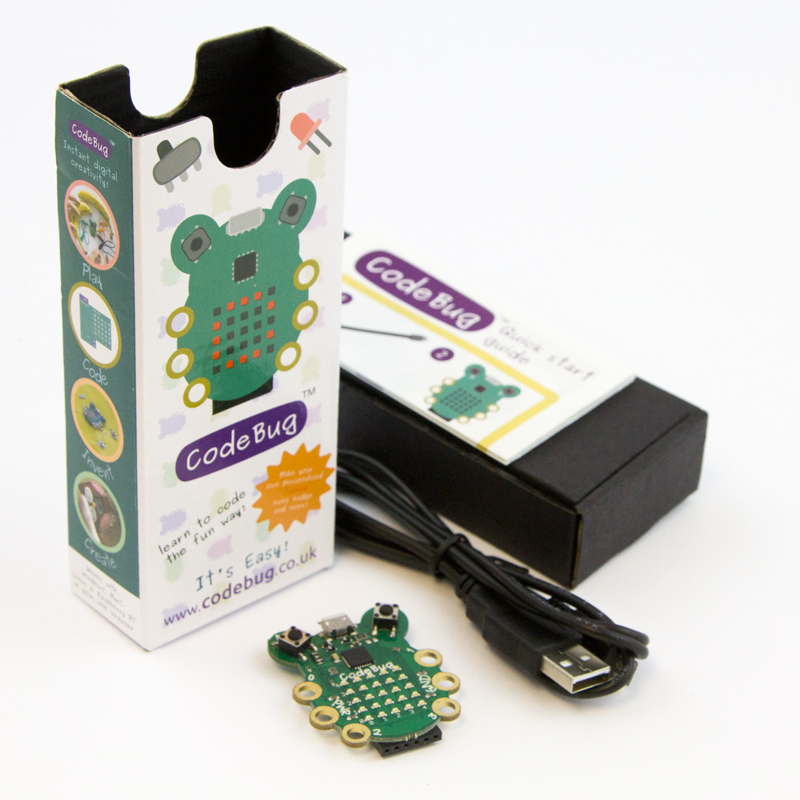
Experimenters Kit
Introduction
CodeBug’s legs are really powerful, you can attached LEDs and button to them using croc-clips, to make your CodeBug project even more interactive, and this guide will show you how!
>Before you start this guide you should have completed the Scrolling Name Badge activity, for an introduction to CodeBug and the website.

|
CodeBug | |||
| Micro USB cable | ||||
| Computer | ||||
| CR2032 battery | ||||
| Crocclips | ||||
| Buttons | ||||
| LEDs | ||||
Croc-clips and wires
Croc-clips are useful wires that can clip to all sorts of electrical components.
Many croc-clips come in bright colours but they work the same way no matter what colour they are. However to make projects simpler certain colours are typically used for certain tasks. For example, black is used for ground(-) connections and red for power(+). This is so it doesn’t become confusing with complicated projects.
Lights!
CodeBug’s legs can be used to turn LEDs (and other things!) on or off. In this mode the legs are called outputs.
How LEDs work
LED stands for light emitting diode, they are essentially really small light bulbs. So firstly, what is a diode? A diode is simply something that lets electricity flow in one direction and not the other.
LEDs create light because they are made of two different materials. One of the materials requires the electrons to have less energy so they lose their extra energy in the form of light.
Lighting up an LED with CodeBug
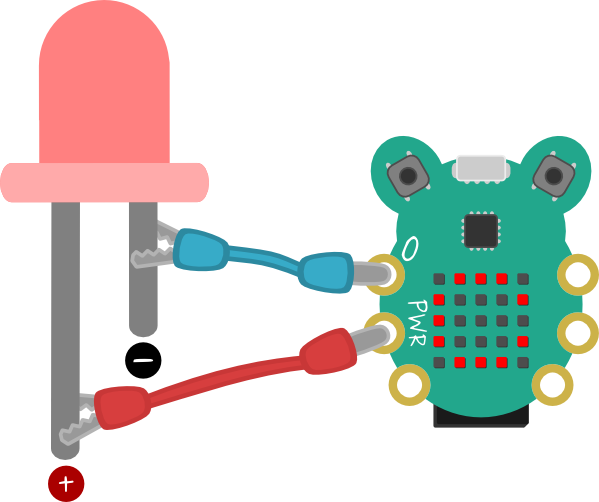
Connect a red croc-clip to the power leg (PWR) of CodeBug and another croc-clip to leg 0.

LEDs have two leads and one is longer than the other. The longer lead is the positive one, so connect this to the red croc-clip that is attached to the PWR leg on CodeBug. The shorter lead is the negative one, so connect this to the croc-clip attached to leg 0. LEDs will also sometimes have a flat edge on the plastic casing, this indicates the negative side.
Follow the tutorial below to flash your LED!
Tutorial
Buttons!
CodeBug’s legs are can also detect electric currents. In this mode they are called inputs.
How buttons work
Buttons work by controlling whether two contacts are connected or not. When the button is pushed the two sides are connected and electricity can flow. In the off state (not-pressed) no electricity will flow.
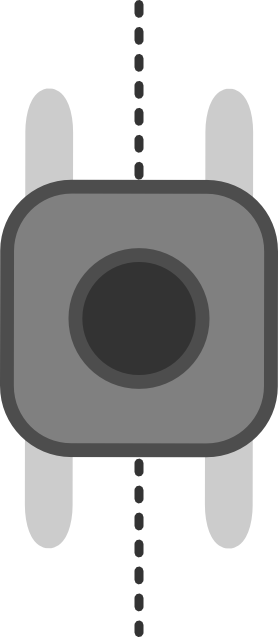
The button diagram above shows how the buttons legs are connected. The two legs on the left are always connected together, and the two legs on the right are always connected together. While you press the button, the left side and the right side are connected.
Using a button with CodeBug
Connect a black croc-clip to the ground leg (GND) on CodeBug and attach the other end of the croc-clip to a lead on the button. Now connect another croc-clip to leg 1 of CodeBug and the other end to the lead diagonally across from the other leg you have connected to. 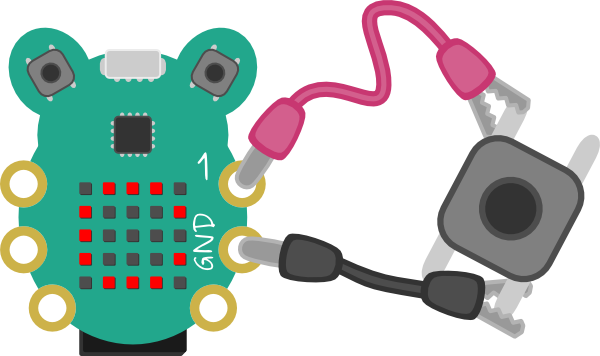
Follow the tutorial below to write programs for your button!
Tutorial
Touch sensitive inputs
CodeBug’s legs are also touch sensitive, so you don’t have to use switches -- you can just use your hands!
Leave your program on CodeBug from the previous step and make sure CodeBug is powered.
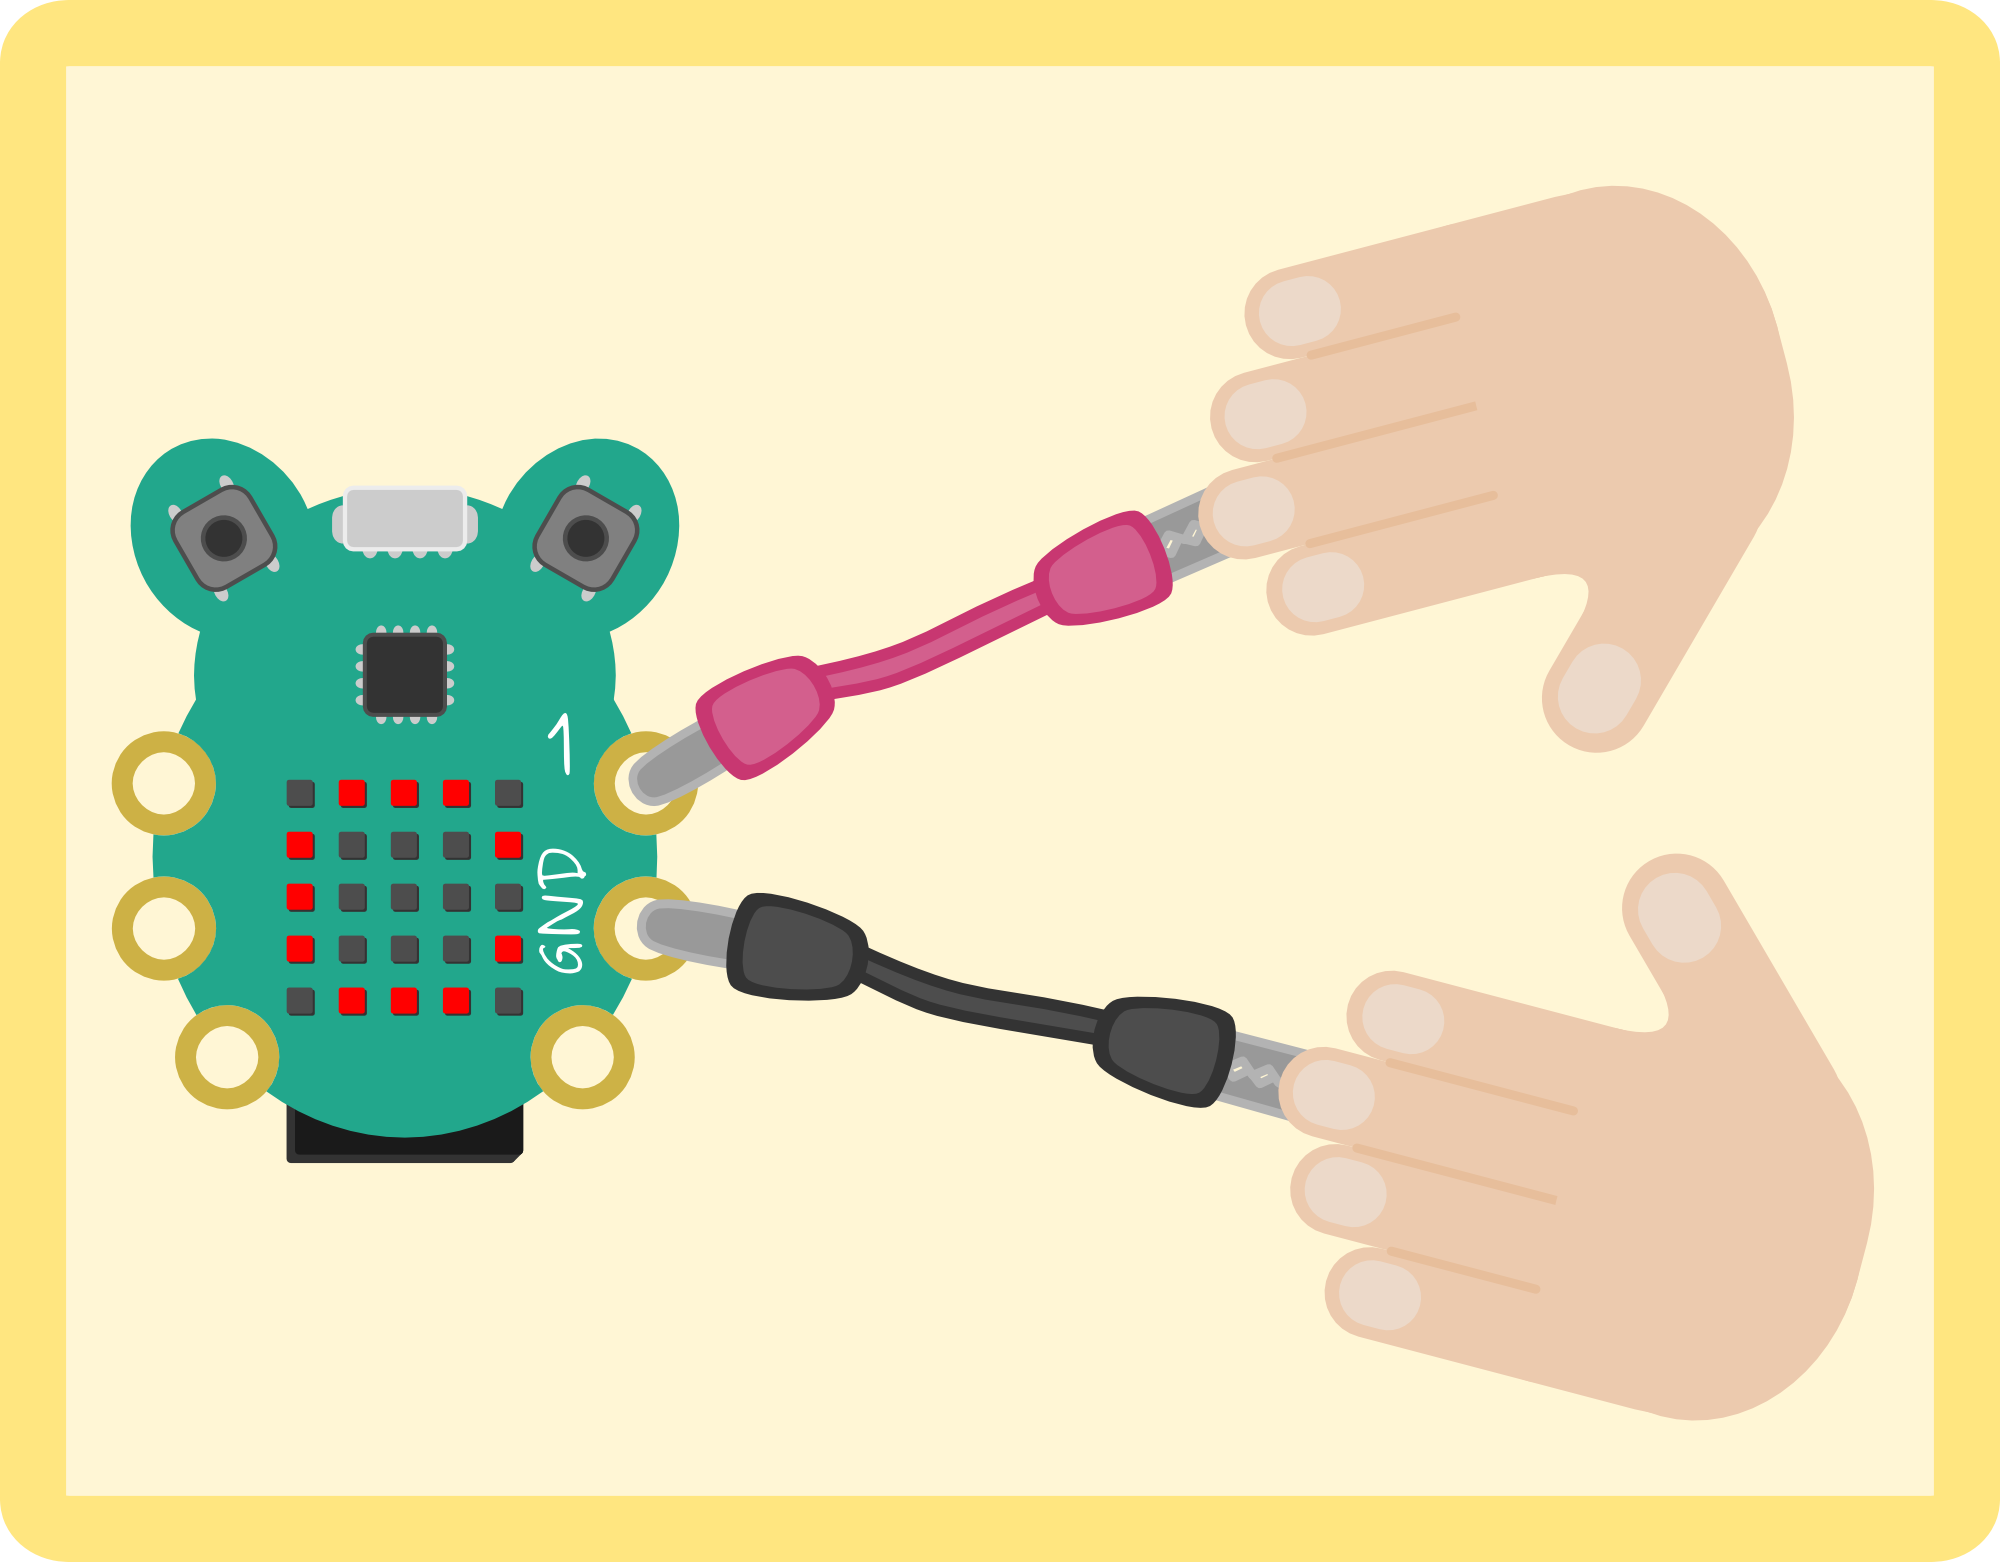
Disconnect your button from the croc-clips, but leave the croc-clips connected to CodeBug’s legs (1 and GND).
Hold the metal end of one croc-clip in one hand and touch the end of the other croc-clip with your other hand.
When you touch the clip, CodeBug senses it and runs the blocks of code you told it to.
This works because everything containing a lot of water will conduct a small amount of electricity. This is not enough electricity to power something like an LED, but it is enough for CodeBug’s legs to sense. Since the human body is about 70% water YOU conduct this small amount of electricity too!
Try holding a friend’s hand and get them to touch the other croc-clip.
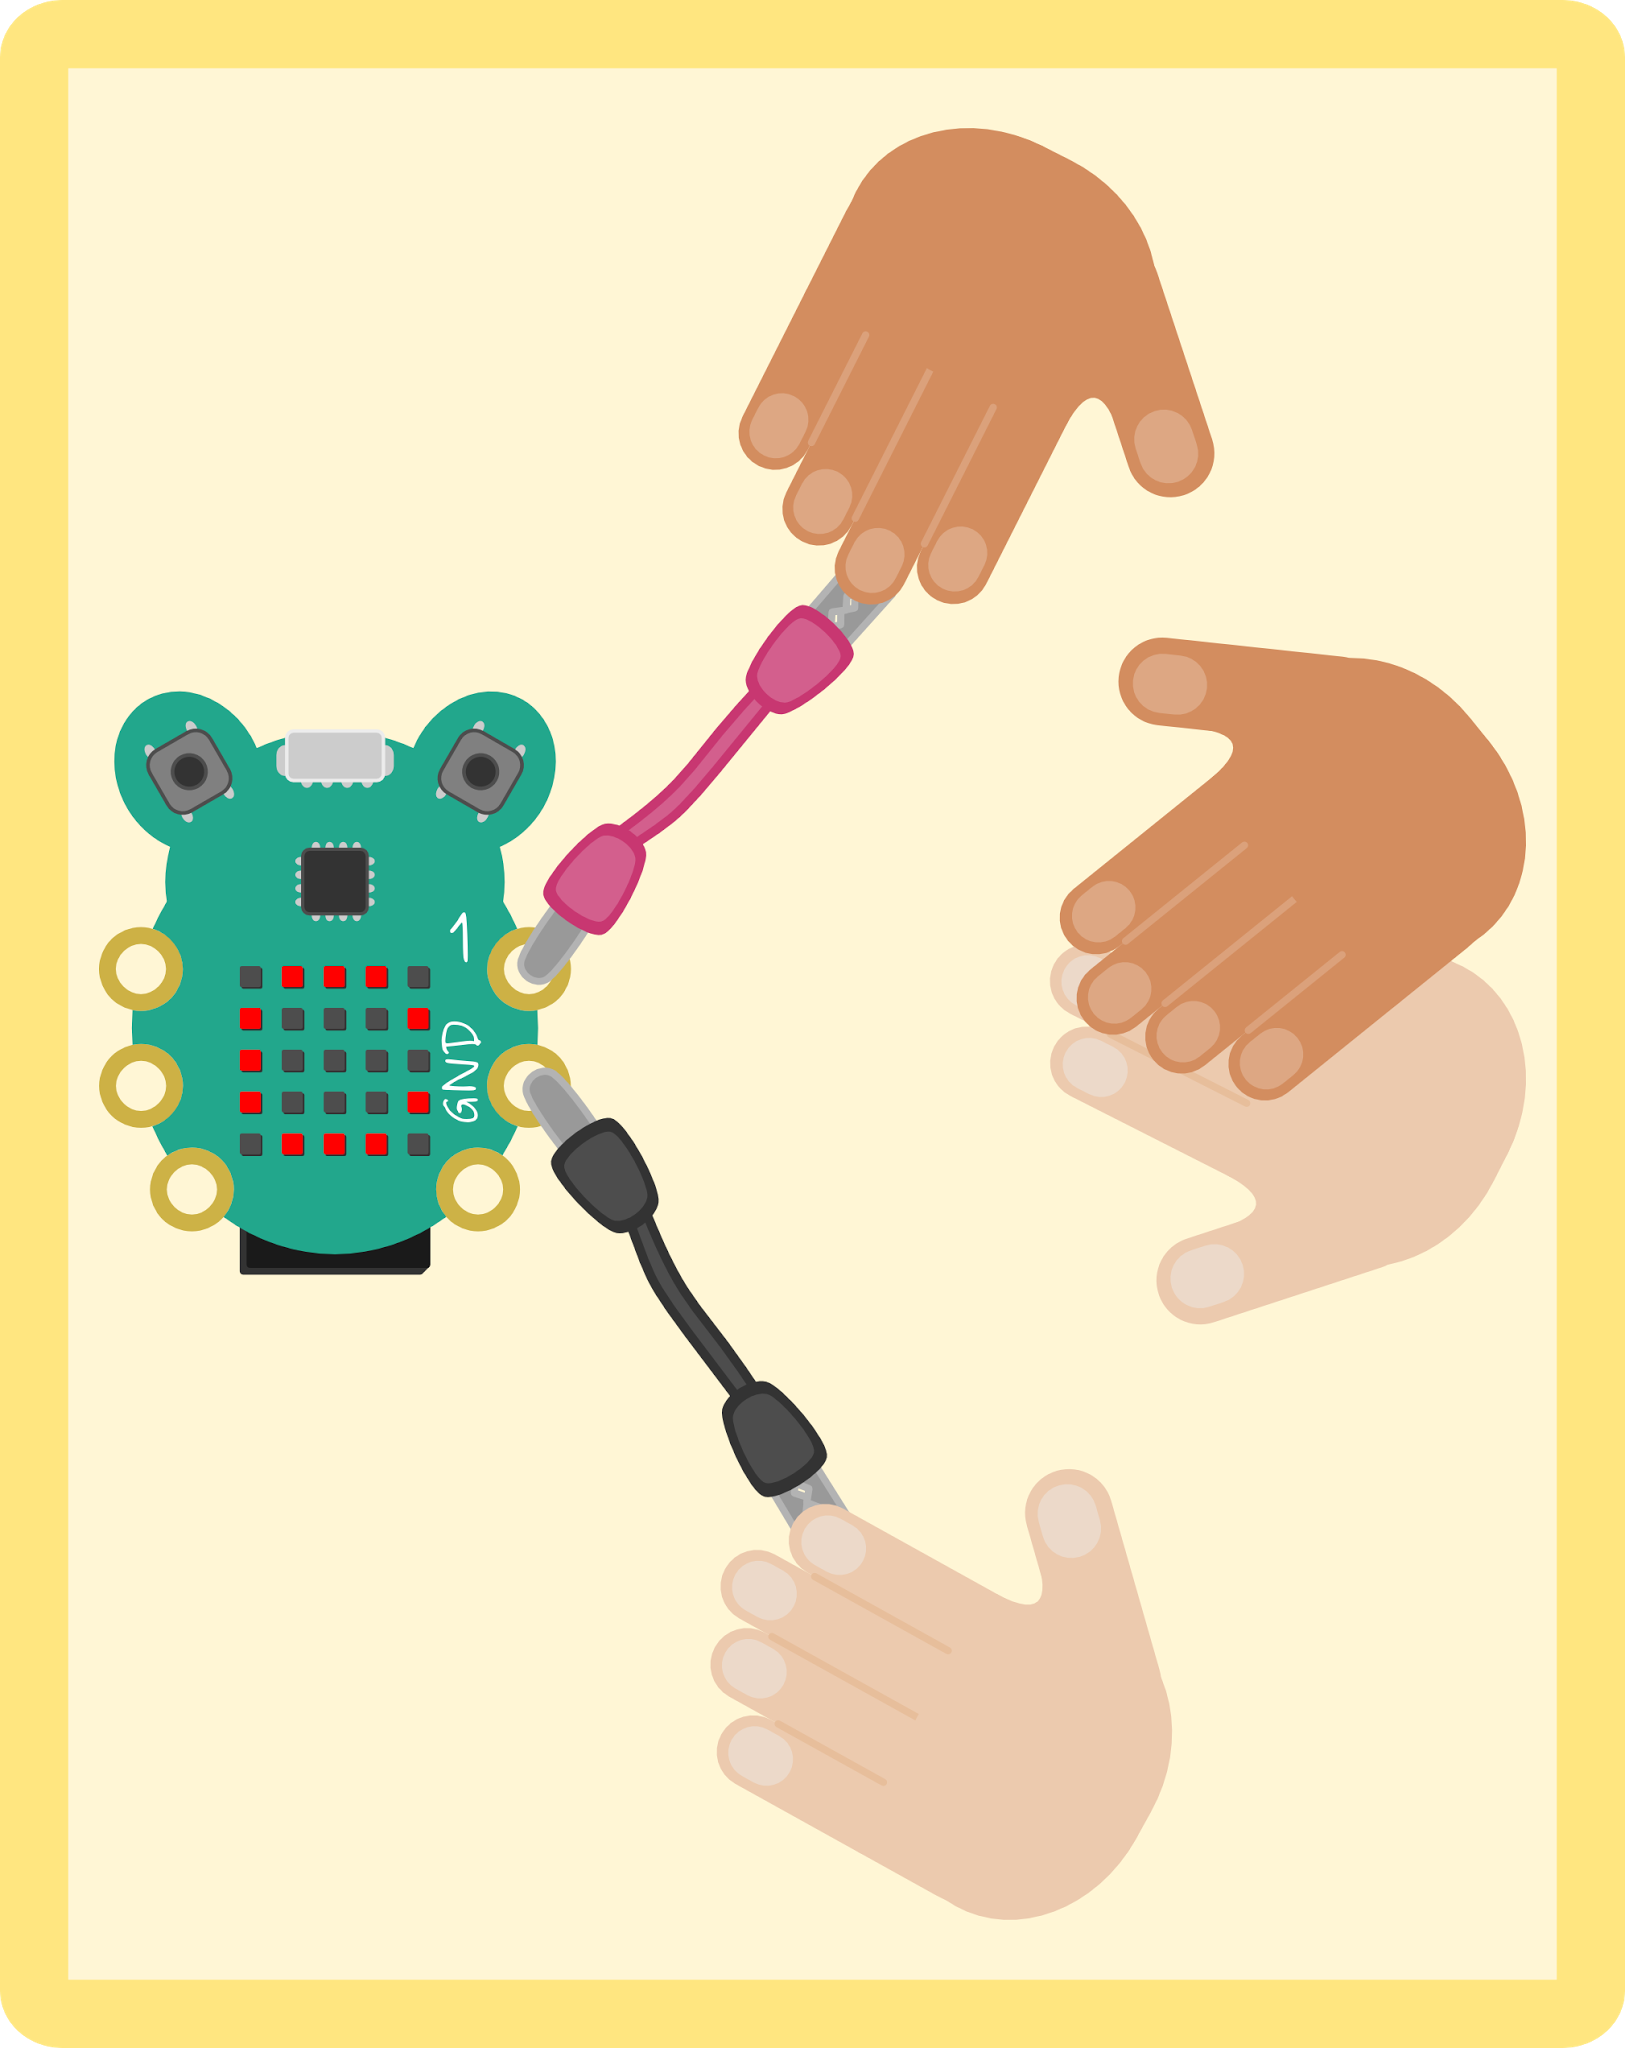
Gather some more friends and see how many how people can be in the chain before CodeBug can’t sense the electricity anymore. Each extra person adds some resistance to the electricity in the chain. Each person in the chain adds more resistance which makes it harder for the electricity to flow.