Tethering Codebug With Python
Introduction
Reach the full potential of your CodeBug with tethered mode. You can make programs that will be able to:
Respond and control Minecraft
Display Tweets on CodeBug
Control CodeBug from the web
Display alerts and the time on CodeBug
Create anything you can imagine in Python
Turn CodeBug into an Internet of Things device
To use CodeBug Tether you will need to load it with a special project file. Once this is done you can control CodeBug with Python over a USB connection.

|
CodeBug | |||
| Micro USB cable | ||||
| Computer | ||||
Set up Tethered mode
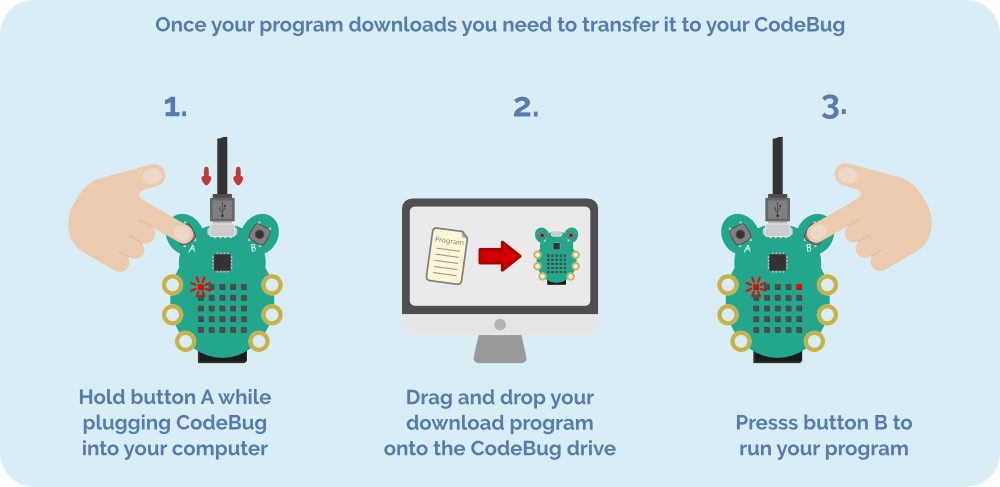
For tethered mode you need to load your CodeBug with a special project file. This is done in the same way as a regular CodeBug program (refer to the download guide for details).
Download the CodeBug tether project file and load it onto your CodeBug.
Next, you need to install some Python modules.
Python libraries for Raspberry Pi & Linux
You must now install the Python libraries that will talk to your CodeBug. Python should already be installed but for good measure:
sudo apt-get install python3To install pip, securely download get-pip.py, then run the following:
python get-pip.pyTo install codebug_tether, open up a terminal and type:
pip install codebug_tetherPython libraries for Windows
Download and install the latest version of Python 3 from here. Make sure you tick the Add Python 3 to environment variables checkbox.
To install codebug_tether, open up a command prompt and type:
pip install codebug_tetherPython libraries for MaxOSX
Download and install Xcode (if you haven’t already) and then enable the command line tools by running (in a terminal):
xcode-select --installNow install Homebrew (a package manager for OSX):
/usr/bin/ruby -e "$(curl -fsSL https://raw.githubusercontent.com/Homebrew/install/master/install)"The script will explain what changes it will make and prompt you before the installation begins. Once you’ve installed Homebrew, insert the Homebrew directory at the top of your PATH environment variable. You can do this by adding the following line at the bottom of your ~/.profile file:
export PATH=/usr/local/bin:/usr/local/sbin:$PATHNow, we can install Python 3:
brew install python3
This will take a minute or two.
To install codebug_tether, open up a terminal and type:
pip install codebug_tetherPython tethered programs from Blockly emulator
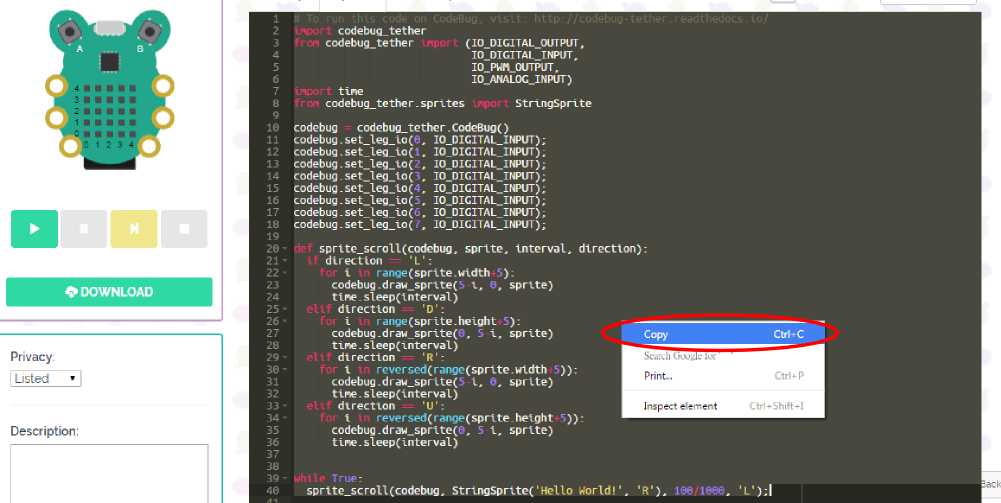
If you are not confident with programming in Python or you have a CodeBug Blockly project you want to use in tethered mode, you can generate tethered Python from Blockly code.
On the create page, drag blocks to create a repeating scrolling message program in Blockly and then test it with the emulator. Now click the Python tab just above the Blockly workspace.

Left-click and drag the highlighter box around all of the Python code and then right-click and select Copy.
Now open a text editor (such as Notepad, Leafpad, TextEdit or IDLE) and Right-click and paste the code into the blank document. Save this as "codebug-tether-test.py" in your home directory.
Open a Terminal and type:
python3 codebug-tether-test.pyYou will see your message scrolling on your tethered CodeBug. In your Terminal window, hold Ctrl C to stop the program.
Your own tethered CodeBug programs
You can write your own tethered CodeBug programs using Python and a few simple commands to control your CodeBug. In the next steps you will start an interactive Python session and enter commands to interact with your tethered CodeBug. Don’t forget you need the tethered mode project installed on your CodeBug for them to work.
Open a Terminal and type:
sudo python3You will see the python prompt appear >>> Now type:
import codebug_tether
import codebug_tether.sprites

cb = codebug_tether.CodeBug()

cb.set_pixel(2, 2, 1)
You will see the center LED - at position (2, 2) - light up on CodeBug.
NB: On some computers, or if you have multiple CodeBugs you will have to put the address of your CodeBug in brackets. More details are in the section Addressing Your CodeBug.
Now try setting a row of CodeBug’s LEDs at the same time:
cb.set_row(3, 0b10100)You will see the third row of LEDs light up in the sequence you gave. 0b10101 is a binary value. The 0b shows that it is binary and the 10100 determines which bits (or LEDs in our case) are on. 1 represents on and 0 represents off. This means that the LED to the far left is on (column 0), the next LED is off, the next on (column 2), and the final two LEDs are off.
Write text on the CodeBug’s LEDs, using the commands:
cbmessage = cb.sprites.StringSprite(("A")
cb.draw_sprite(0, 0, cbmessage)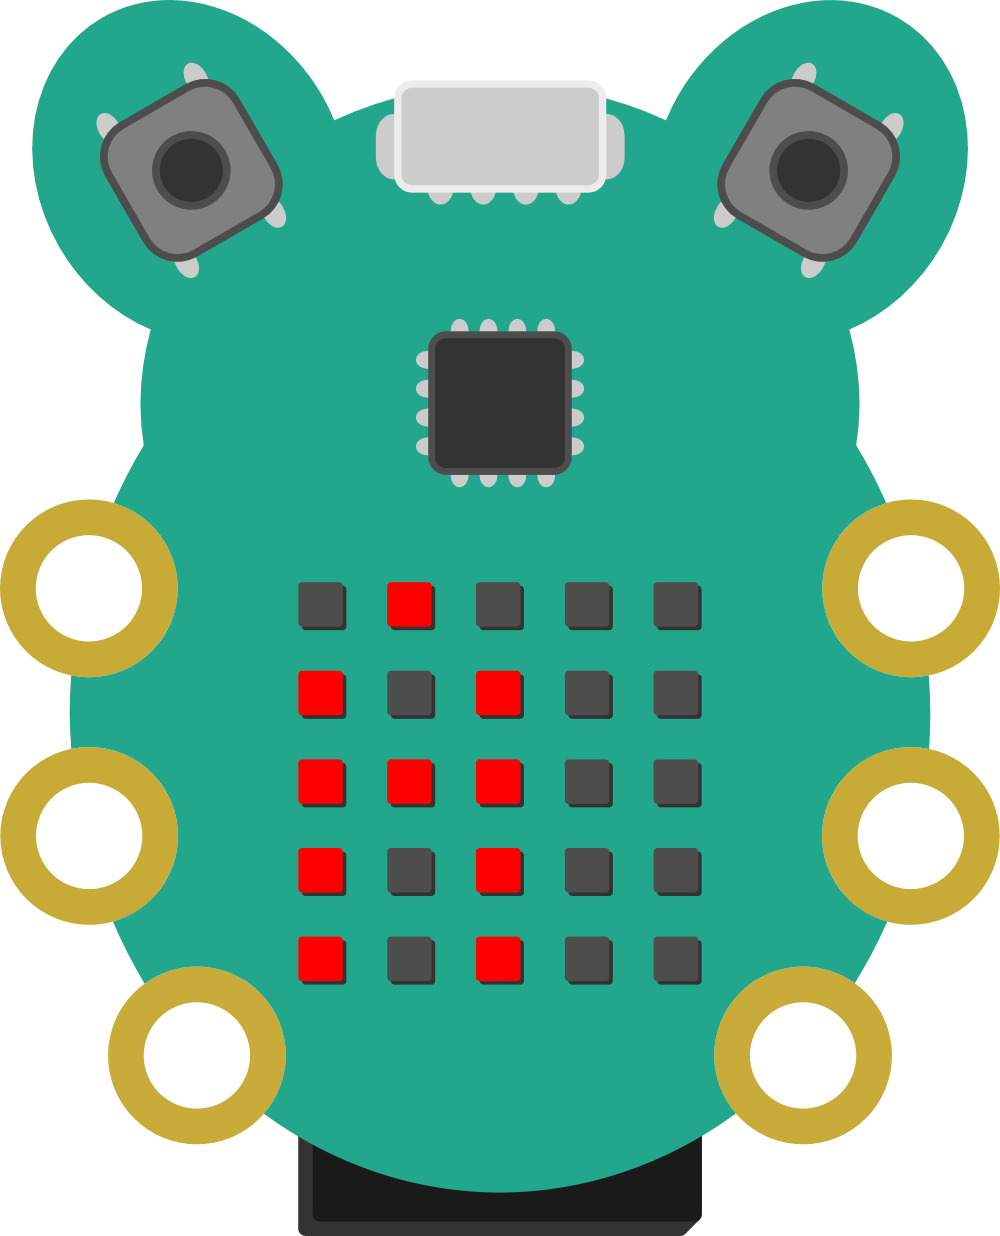
An A will appear on the CodeBug LEDs.
To write scrolling text on CodeBug’s LEDs, first import the time module:
import timeNow you can scroll text using the commands:
cbmessage = cb.sprites.StringSprite('Hello')
for i in range(0,-30,-1):

    codebug.draw_sprite(i, 0, cbmessage)

    time.sleep(.1)
The text "Hello" will be scrolled on CodeBug’s display.
Check whether a button is pressed, by giving get_input either an 'A' or a 'B':
cb.get_input('A')This will return True if the button is pressed, otherwise it will return False.
Get a full list of the commands available by typing:
help(cb)Press Crtl D to exit Python. You can write longer programs for tethered mode CodeBug by writing commands in your text editor and then saving and running the file in the way you did with the examples earlier.
Tethered mode gives your CodeBug access to the full computing power, functionality and network connectivity of your computer! You can use variety of powerful yet easy to use Python modules allow your CodeBug to generate random numbers, react to emails or even respond to Twitter.
Addressing Your CodeBugs
The CodeBug tether library has a default address for CodeBug. In most cases this will work, however if you have multiple CodeBugs connected you may need to change the address you’re using.
To do this, first open a Terminal and type the commands:
ls /dev/tty*Plug the CodeBug back into your computer’s USB port and wait a couple of seconds. Then type the command:
ls /dev/tty*See what address has been added to the list (you should see something like ttyACM0 for Raspberry Pi or tty.usbmodemfd141 for Mac). You may find it easier if you unplug your other USB devices first.
When you initiliase CodeBug in your Python programs, you must pass it the address you have found.
e.g.
cb = codebug_tether.CodeBug('/dev/tty.usbmodemfa141')