Motion Sensing Codebug
Introduction
Ever suspected someone of sneaking into your room and plays with your stuff when you’re not around? Well now you can catch them in the act with your own motion sensing CodeBug.
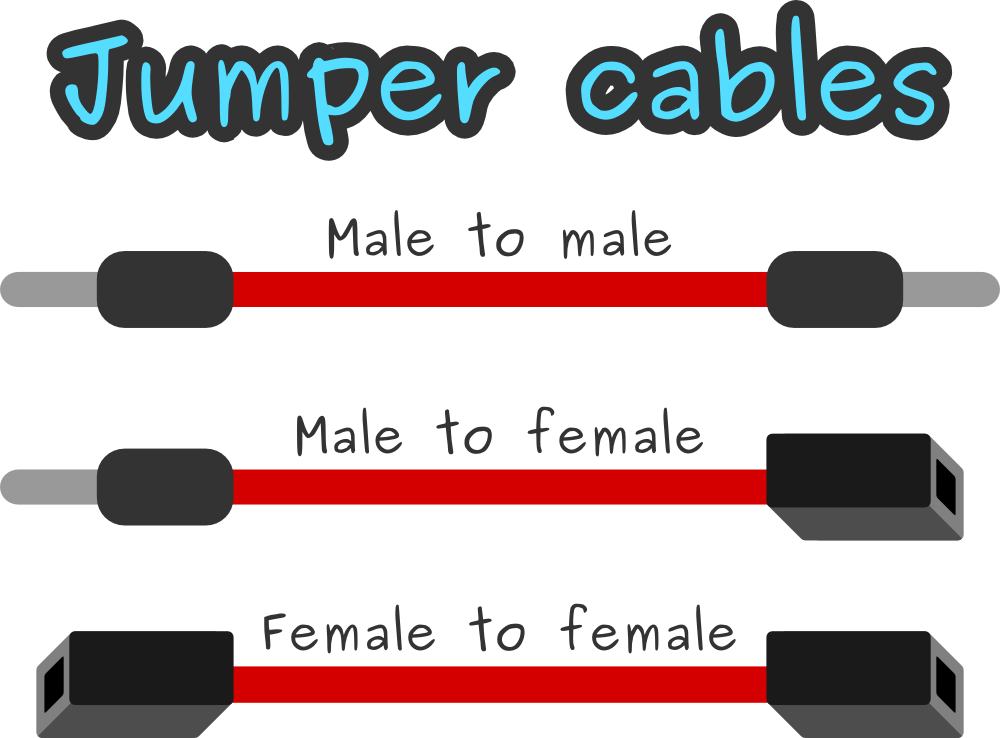
This activity will show you how to connect a PIR sensor to CodeBug and read its value. If your PIR has a male pin connector, you will need male to female jumper cables. If your PIR has a female socket connector, you will need male to male jumper cables.

|
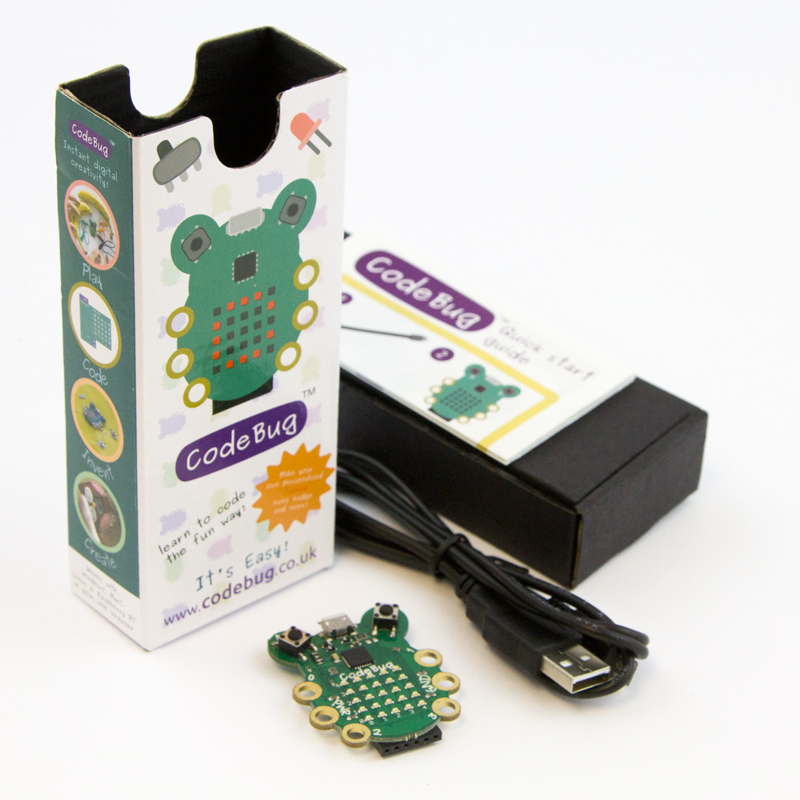
CodeBug | |||
| Micro USB cable | ||||
| Computer | ||||
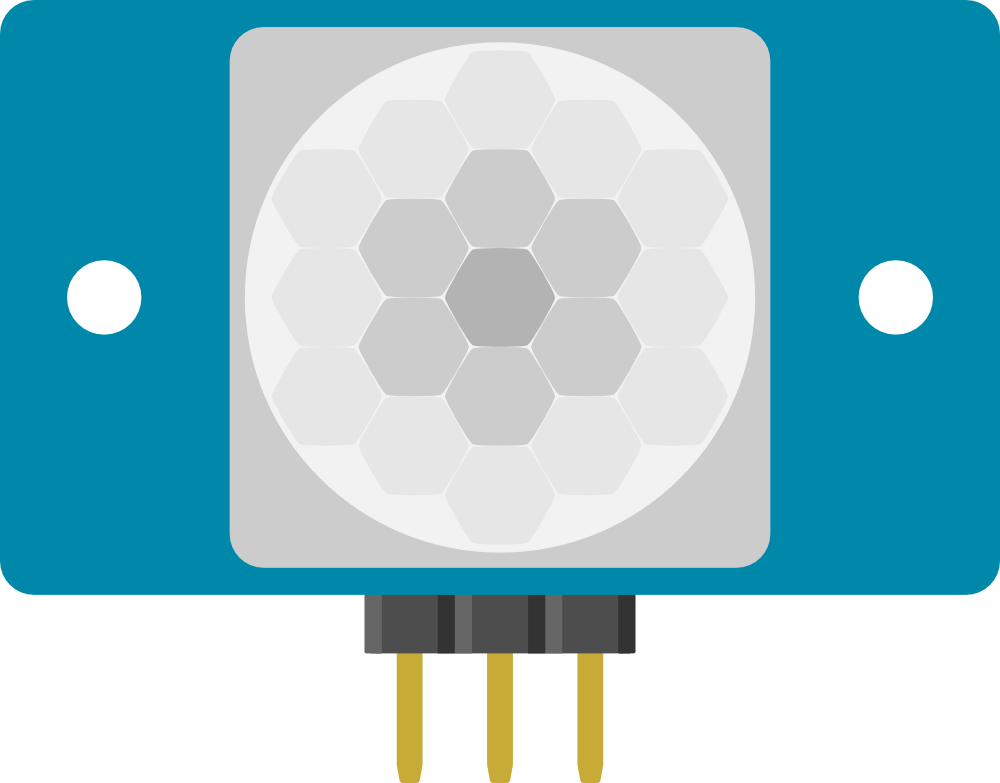
| PIR Sensor | ||||
| Jumper cables | ||||
Wiring up your sensor
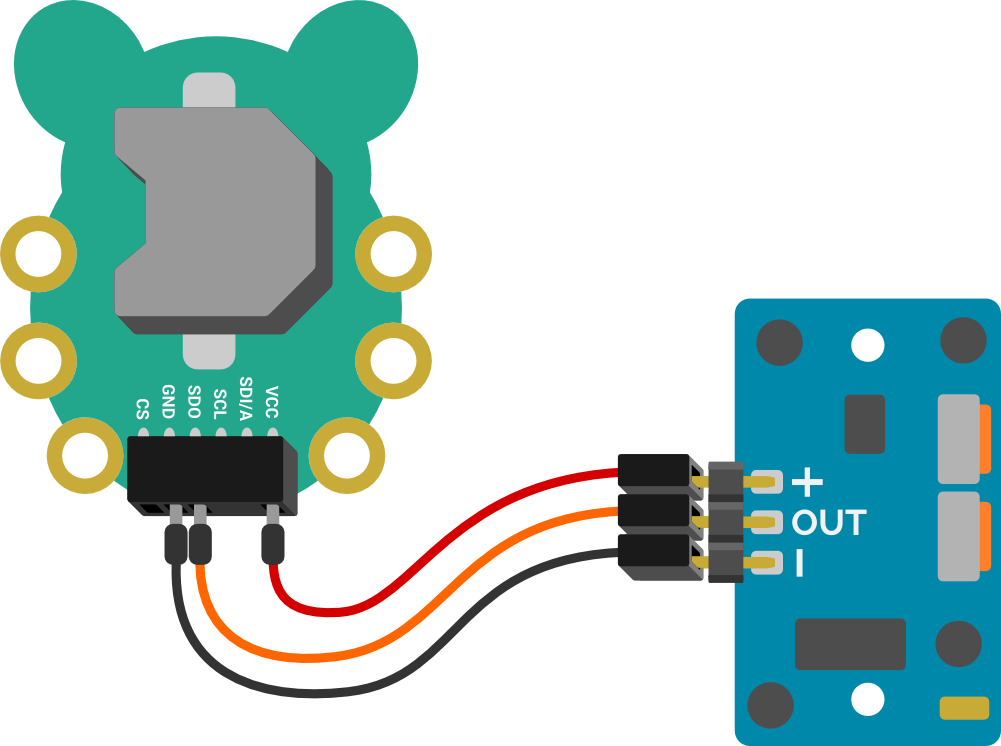
You may need to check the information sheet of your PIR sensor, however they usually have three pins, labelled (+) (OUT) and (-). Using three jumper cables, connect the positive (+) pin of the PIR to the VCC hole on CodeBug’s black expansion port, connect the negative (-) pin to the GND hole on CodeBug’s expansion port and the output pin to the SDO hole.
Top Tip!
PIR sensors are used everywhere to detect movement, such as in security lights. PIR stands for Passive InfraRed, it is a type a sensor that can detect changes in the amount of infrared (IR) light. The IR light it senses can either be reflected by objects or given off by anything that produces heat (such as people and animals).Writing your program
We need to set up one of CodeBug’s legs as a digital input to read your PIR sensor. Follow the tutorial below to write your code.
Tutorial
Testing your sensor
Test your code by moving your hand in front of the dome shaped sensor and watch the "Intruder" message pass by. Well done, you have made CodeBug see motion! Have a go at adjusting the dials on your PIR sensor to change the sensitivity and test the range of your sensor.
What next
Try connecting an LED to CodeBug to light up when it senses motion, just like the security lights.
You could also try connecting a sounder to make a motion alarm. In your code you may want to put a check to see if the motion detector has been triggered and play a note until one of CodeBug’s buttons is pressed. Use it to detect intruders in your sweet cupboard or secret den!
How about connecting your CodeBug to a Raspberry Pi and triggering the Pi Camera to snap a photo of your intruders.