One moment…
We're building your program and it will be downloaded shortly.
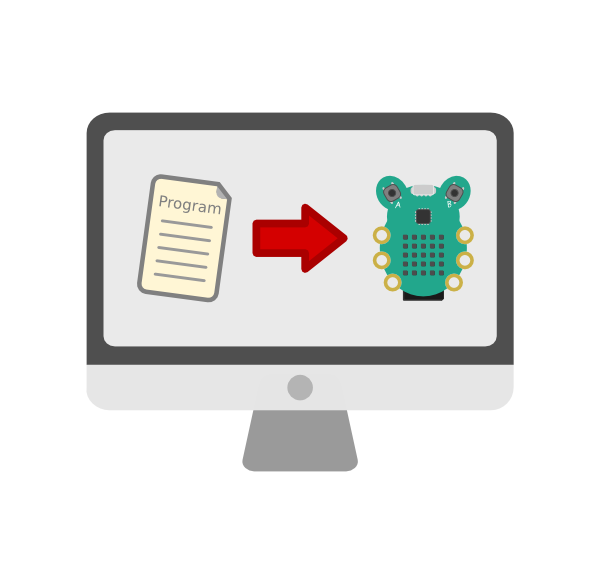
Once your program downloads you need to transfer it to your CodeBug.
1.
2.
3.
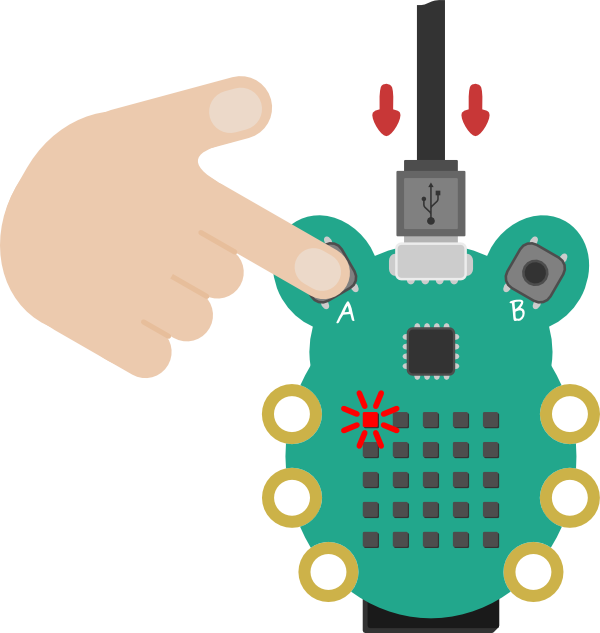
Hold Button A while gently plugging CodeBug into your computer.
Drag and drop your downloaded program onto the CodeBug drive.
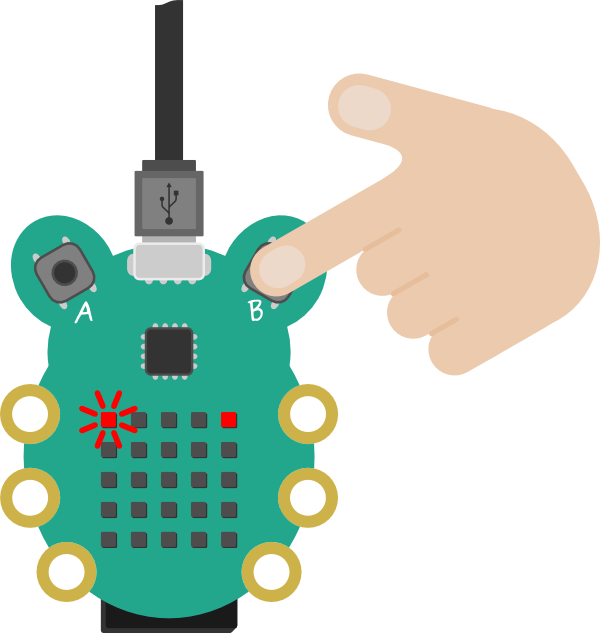
Press Button B to run your program.
Frequently Asked Questions
Why isn't my CodeBug appearing as a USB drive?
Some USB cables are power only and therefore will not program CodeBug. Make sure you are using a data-USB cable to connect CodeBug to your computer.
How do I program my CodeBug with a battery in it?
You will have to reset your CodeBug in order to put it into programming mode. To do this: hold down both buttons A and B for 10 seconds, then release button B.
Emulator Settings
Connected Hardware Per project
Emulator Options Per user
Emulator info
This, the CodeBug emulator, allows you to test and debug your code quickly. It simulates what would happen on a real, physical CodeBug.
Running your program
Click the green play button on the left to start your program running.Holding a button down
If you want to keep a button held down when you release the mouse, hold Ctrl when clicking the button to toggle it.Legs and extensions
You can connect addons (like GlowBugs) and extra electrical components to your CodeBug in real life, and you can simulate them in the emulator too!. You can simulate entire components (like the ColourStar) or the electrical signals (that you might connect to a motor) on CodeBug's legs.
To set what is connected to the emulated CodeBug, click the green cog in the top right of the emulator box. In the window that appears, you can chose to show leg controls or select the virtual hardware (such as GlowBugs and ColourStar) you wish to connect.
With the leg controls shown, the blue arrows point to show if a leg is configured as an input or as an output. Whether the leg has a signal on it is shown with the colour Red or Gray. The state of an input leg will change while it is clicked, or toggle by Ctrl-clicking.